Life is such a chaotic mess that it can be hard to keep track of everything happening around you. This is one of life’s simple truths that you just can’t get around. That’s why it’s so satisfying to be able to control and organize properly the smaller things: folder, files, documents, etc.
And what’s the first step towards organization? Lists. Besides our tutorial post on numbered lists, in this post, we will explain how to create a bulleted list in InDesign, so that your InDesign documents will always be satisfyingly organized.
Before we jump in, it’s good to remember that InDesign can essentially be used one of two ways.
(1) You can either set your styles locally,
(2) or you can create variables that format your text in a faster and more precise way. These variables are called Paragraph Style and Character Style.
If you’ve ever consulted our posts before, be they posts on tutorials, templates, scripts, or anything else, you might have picked up on one simple fact: here at Redokun, we strongly prefer the second method.
Nonetheless, in this post, we will look at both ways to create a bulleted list.
We’ve divided the topics of this post into sections to help you navigate better. Click on the links to jump to each section:
- How to Create a Bulleted List in InDesign (Through Local Formatting)
- Why use a Style to Create a Bulleted List
- How to Create a Bulleted List using a Paragraph Style
How to Create a Bulleted List in InDesign (Through Local Formatting)
We will now go through how:
- to transform text into a bulleted list;
- edit the bullets’ indentation value;
- change the bulleted list used by InDesign.
Transform text into a bulleted list
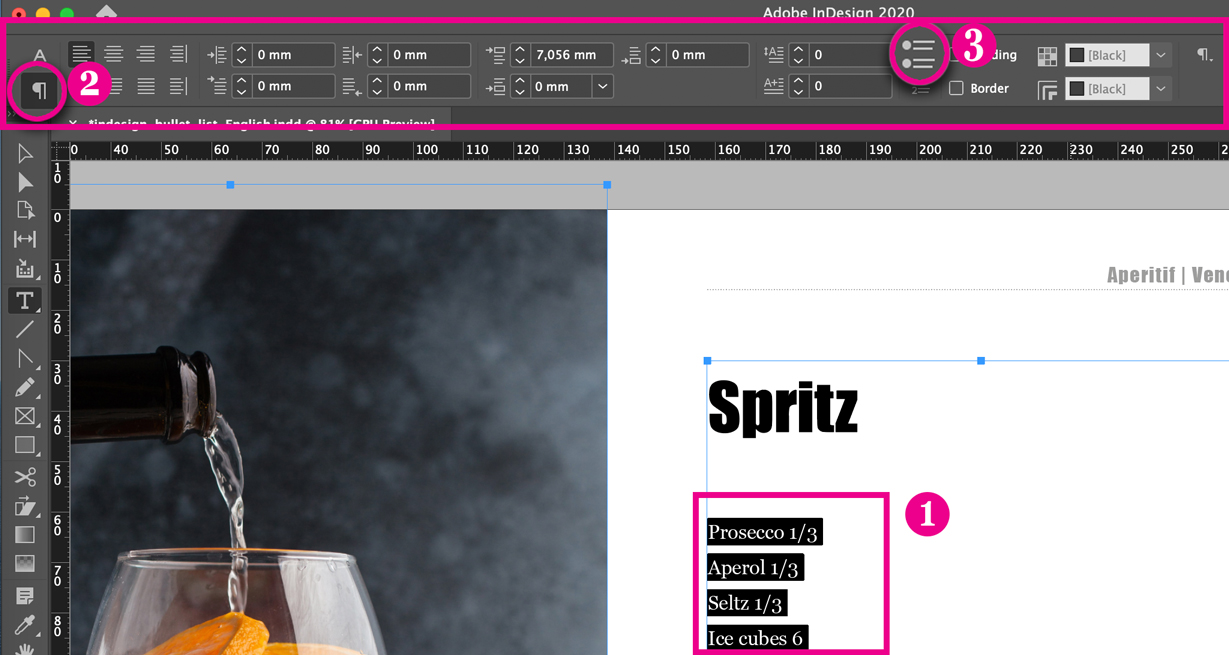
- Select the text that you want to change into a bulleted list (1).
- Now, look at the control bar you see on the top of the screen.
- Make sure that the icon on the left (2) with the paragraph symbol is switched on, if it isn’t, click on it.
- Click on the bulleted list symbol (3) to transform the text into a list.
Edit the bullets’ indentation value
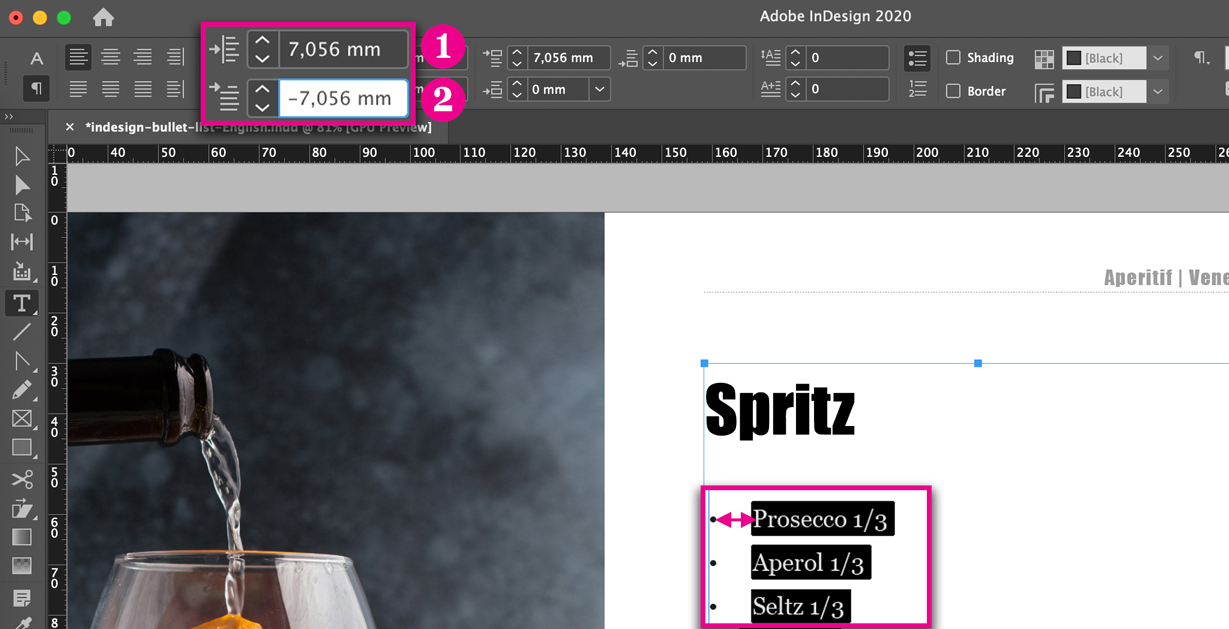
Once you’ve turned text into a bulleted list, you have to set the distance between the bullets and the text itself.
- Keep the bulleted text selected.
- Edit the values you see in the control bar as shown in the picture.
- The first value (1) shows the text’s indentation value (in millimeters) calculated from the text box margins.
- The second value (2) shows how far the bullet is from the text (that’s why this value is negative).
Change the bulleted list used by InDesign
Once you’ve created the bulleted list and set the distance between the bullets and the text, it’s time to change the list’s symbol.
- Keep the bulleted list selected.
- At the far left of the top control bar, in the paragraph’s tools, click on the icon with the three horizontal lines (1).

- On the selection, click on the option Bullets and Numbering…
- In the window that will open (image on the right) click on Add… to edit the icon used by InDesign.
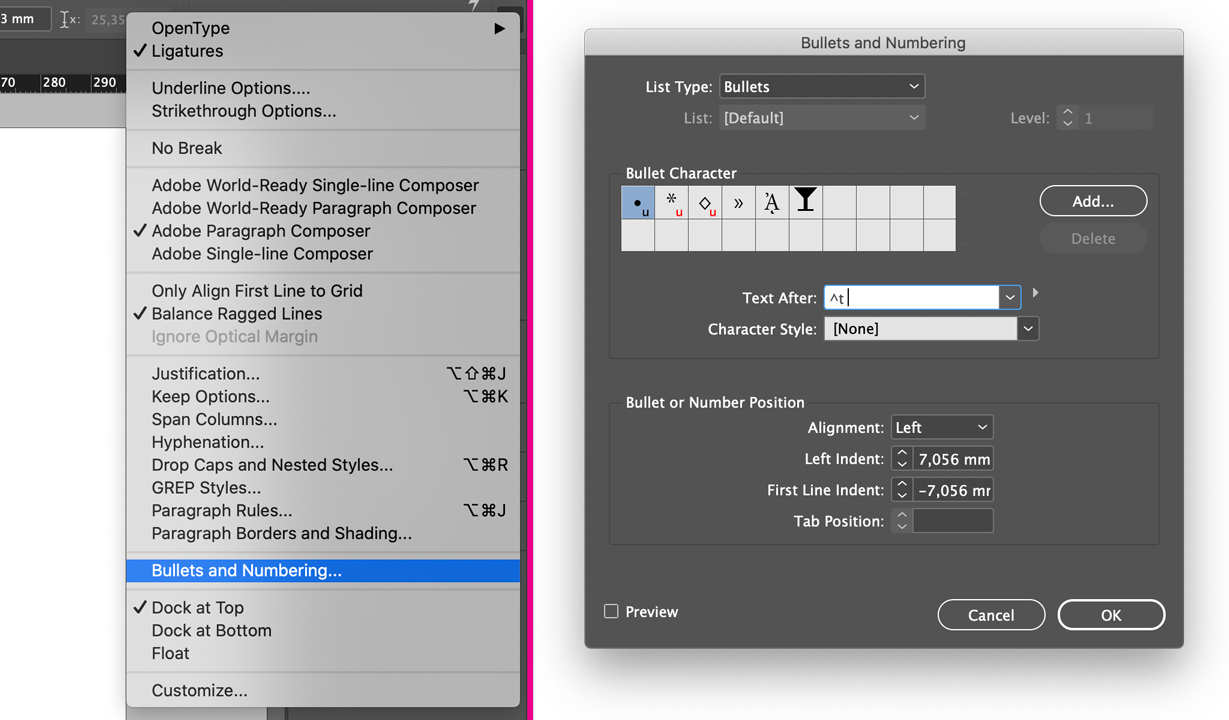
- For this example, I also set a Character style to the bulleted list’s icons, and this is the result.

Why use a Style to Create a Bulleted List
As we’ve said before, if you don’t use Paragraph and Characters Styles, you are barely getting 10% out of your InDesign.
Styles allow you to:
- set the same formatting to different parts of your document with just one click;
- swiftly edit the formatting anywhere in our document.
Not using them means:
- wasting a lot of time;
- your layout will be inconsistent.
If you’ve jumped to this part of the post, though, I suppose you’re already aware of the benefits of using Styles, so let’s jump straight into the bulleted list walkthrough.
How to Create a Bulleted List using a Paragraph Style
Create a bulleted list:
Use the option “Redefine Style”
This will also help you save any style settings you might have applied locally.
- In my document, before editing the bulleted list’s style, I had already set a Paragraph Style to the bulleted list called p-bulleted-text.
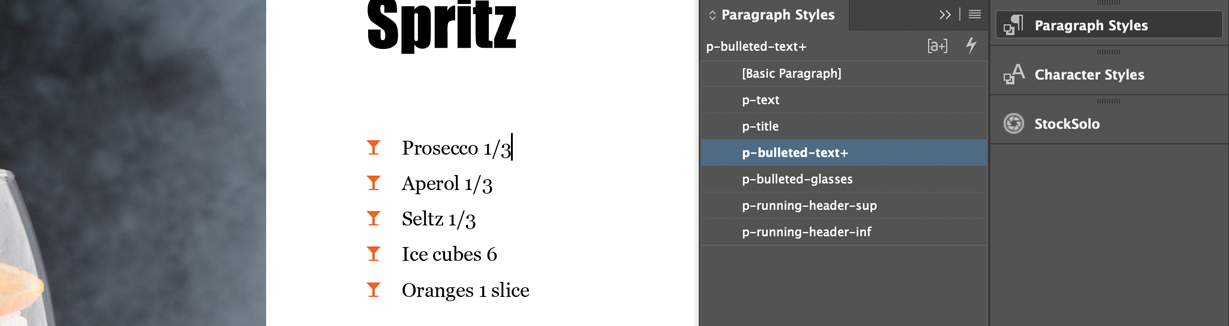
- Now, with p-bulleted-text assigned to the list, drag the cursor inside the list (1).
- Click on the Option icon (2) in the Paragraph Style panel and select Redefine Style (3).

From now on, any time you assign p-bulleted-text to a paragraph you will create a list like the one shown in the “How to Create a Bulleted List in InDesign (Through Local Formatting)” portion of this post.
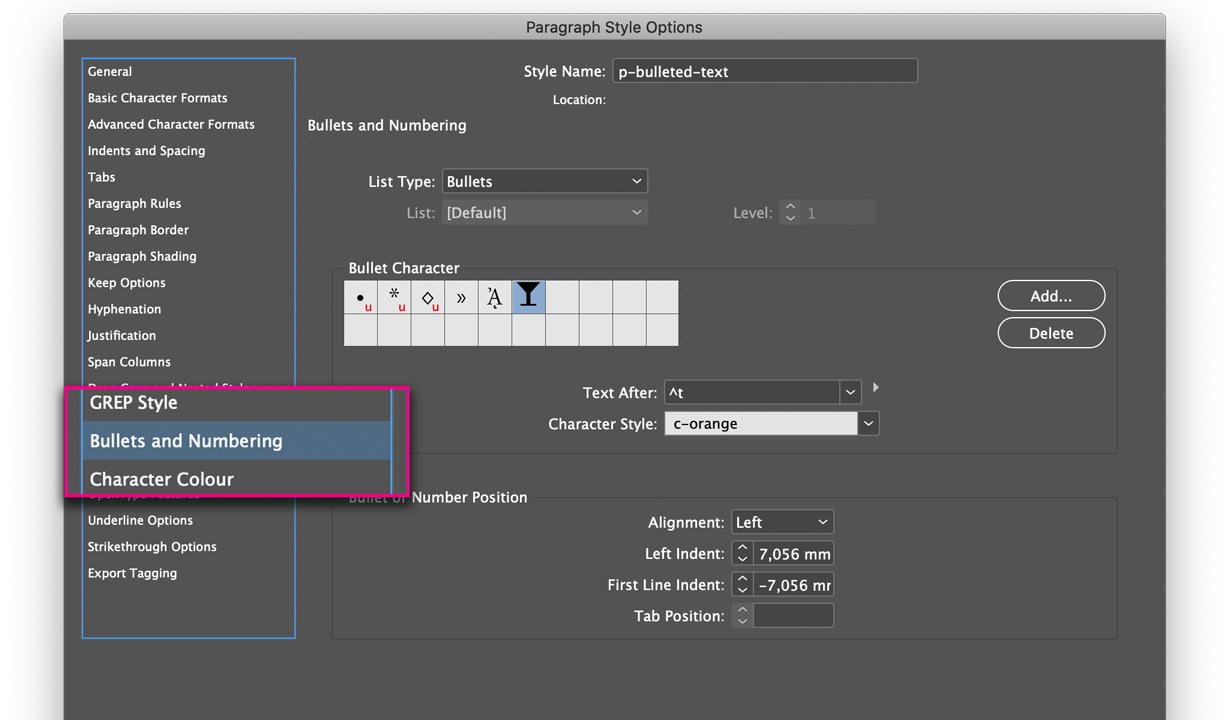
Use the tab “Bullets and Numbering”
If you have a little more experience in InDesign and you want to fully create the bulleted list through Paragraph Style, you can find everything you need in the Bullets and Numbering tab of your Paragraph Style window.
Conclusion
Congratulations, you now know everything you need to create a bulleted list in InDesign, be it through Styles or local formatting. We hope this post has helped you learn a little bit more about this amazing software.
Until next time,
Stefano